We get this question a lot. First, it could be that people have a different understanding of what are private apps or what are public apps.
Private applications are applications:
- where the sources can’t be downloaded from the internet without providing personal information.
- that require a license key or license file.
Private applications are not monitored for new versions.
Note: It’s the customer or partner’s responsibility to provide Scappman any resources for the initial packaging or any update afterwards together with a procedure on how to install the application. Scappman can package these applications, but these are billable. Prices are listed on the platform.
Public applications:
Public applications are applications where Scappman has access to the sources on the website of the vendor. Public applications are monitored for new versions and are updated by Scappman on the platform.
Note: Public applications that do not support silent installs can only be requested as a private application. Scappman will package these applications for free for subscribed customers.
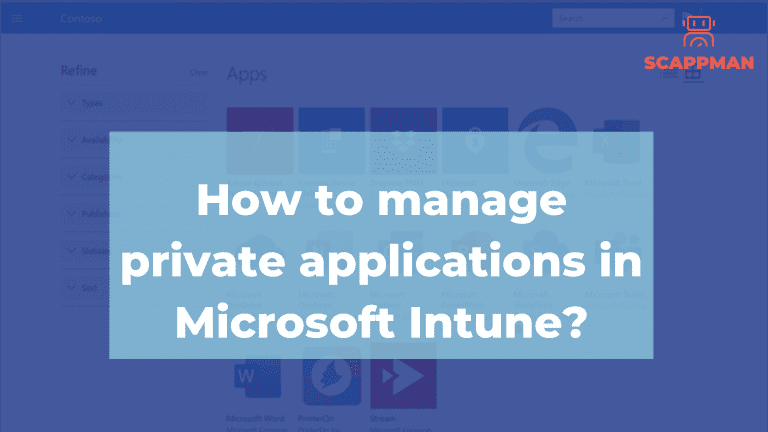
Private application management in Microsoft Intune
Prepare the application installation file for upload
Before you add a private app to Microsoft Intune to be able to manage it, you must use Microsoft Win32 Content Prep Tool in order to prepare the app for upload. The tool wraps the application installation file into the .intunewin format. Also, it detects some of the parameters that Intune requires to determine the application installation state. After that, your application is ready to be uploaded to Intune. Let’s use the app <yourprivateapp> as an example.
- Download Microsoft Win32 Content Prep Tool from GitHub . The .zip file contains IntuneWinAppUtil.exe, Microsoft License Terms, Read me file and Release notes. Use the latest version of the Microsoft Win32 Content Prep Tool otherwise, you’ll see a warning that says the app was packaged using an older version of the tool.
- Create a folder that contains the private application installation files
- Create an installation file yourprivateapp.cmd that contains the installation command and put the file in the directory with other installation files.
- Now open a Command Prompt and go to the location of IntuneWinAppUtil.exe: cd/<name of the folder>
- Run IntuneWinAppUtil.exe and provide the requested information:
- Source folder
- Setup file
- Output folder
6. Once the installation file is converted, you’ll see the message Done!!! Now the private application is ready to be uploaded to Microsoft Intune.
Add a private app to Intune
- Sign in to the Microsoft Endpoint Manager admin center
- On the pane go to Apps -> All apps -> Add
- In Select app type menu choose Windows app (Win32)
- In the Add App menu you have to select the app package – the file that we created – yourprivateapp.intunewin in click OK
- In the App information menu add the details for your private application:
- Name
- Description
- Publisher
- Category
- Show this as a featured app in the Company portal
- Information URL
- Privacy URL
- Developer
- Owner
- Notes
- Logo
6. In the Program tab you can configure the application installation process using commands, install and device restart behavior.
- Install command – normally, it’s filled in automatically. If it’s not the case – use yourprivateapp.cmd
- Uninstall command – msiexec /x “{12345A67-89B0-1234-5678-000001000000}”
- Device restart behavior – here you can select one of 4 options:
- Determine behavior based on return codes
- No specific action: Choose this option to suppress device restarts during the app installation of MSI-based apps. This is preferred if you don’t want to reboot the device after the app installation
- App install may force a device restart
- Intune will force a mandatory device restart
- Specify return codes to indicate post-installation behavior: add the return codes that are used to specify either app installation retry behavior or post-installation behavior. Return code entries are added by default during app creation. But you can add more return codes or change existing ones. Code types:
- Success – the return code was successfully installed
- Retry – the return code will be attempted to be installed the application 3 times. It will wait 5 minutes between each attempt.
- Soft reboot allows the private app to be installed without a reboot. However, reboot is necesssary to complete application installation.
- Hard reboot does not allow the application to be istalled on the device without a reboot
- Failed – the application is failed to be installed
7. In the Requirements section you can specify the requirements that the device must meet before the application is installed:
- Operating system architecture : 32-bit / 64-bit
- Minimum operating system
- Disk space required (optional)
- Physical memory required (optional)
- Minimum number of logical processors required (optional)
- Minimum CPU speed required (optional)
8. When deploying the private app you must specify the detection rules – how the availability of the private application will be detected. It can be done manually or by using a custom PowerShell script.
Manual detection rules format:
- MSI: this rule type enables the admin to create a detection rule that must detect a specific MSI product code or even a specific MSI version. This detection rule type can only be used once.
- File rule type enables the admin to create a detection rule that detects a specific file or folder, date, version, or size to determine the installation of the private app. Requirement rules:
- Path – specify the full path of the folder that contains the application file
- File or folder – specify the file or folder that should be used to detect the app
- Detection method – choose the option that should be used to detect the installation of the app (File or folder exists, Date modified, Date created, String (version), Size in MB)
- Registry: with this detection rule the Intune admin enables detection of the application installation based on the value, string, integer, or version. Requirement rules:
- Key path – identify the full path of the registry entry containing the value that should be used to detect the installation of the app. Ex.: HKEY_LOCAL_MACHINE\Software\YourPrivateApp
- Value name: if this property is empty, the detection will happen on the default value. The default value will also be used as a detection value if the detection method is other than file or folder existence.
- Detection method: there are 5 self-explaining methods – Key exists, Key does not exist, String comparison, Version comparison, integer comparison
Custom PowerShell Script:
That rule format enables the Intune admin to create detection rules that can check on basically anything that can be scripted, as long as the script has the correct output. It requires the configuration properties as mentioned below:
- Script file – select a PowerShell script that will be used to detect the installation of the application. When the script exit code is 0 and STDOUT contains any data, the app is detected.
- Run the script as 32-bit process on 64-bit clients
- Enforce script signature check – Select Yes to verify that a trusted publisher has signed the script, which will allow the script to run with no warnings or prompts displayed. The script will run unblocked. Select No (default) to run the script with user confirmation without signature verification.
The Intune checks the results from the running script. It reads the values written by the script to the STDOUT stream, the standard error (STDERR) stream, and the exit code. If the script exits with a nonzero value, the script fails and the application is not installed. If the exit code is zero and STDOUT has data, the application is installed. Use the Microsoft Intune management extension to upload PowerShell scripts in Intune.
9. As an Intune admin, you can identify app dependencies – the applications that must be installed before your private app.
10. If you supersede an application, you can specify which app will be updated or replaced. To update an app, disable the uninstall the previous version option. To replace an app, enable the uninstall the previous version.
11. In the Assignments menu, you can configure Required, Available for enrolled devices, or Uninstall group assignments for the private application.
12. And, finally, after reviewing all the configurations you can add the private application to Microsoft Intune.
Monitor the private application deployment in Microsoft Intune
After you created a new private application in Intune following the steps above, you have to wait until the application is uploaded to Intune.
From the end-user perspective
Once the application is uploaded, the assigned user will see Windows notifications for the required and available app installations. Additionally, the Company Portal shows more app installation status messages to users.
Troubleshooting the private application deployment in Microsoft Intune
For troubleshooting the private application in Microsoft Intune use log files. Viewing the details of logs can help you identify the cause of the issues in the app deployment. You can find logs in Intune or through CMTrace.
Intune: Microsoft Endpoint Manager admin center -> Troubleshoot + support -> Collect logs (Installation details pane for the app)
CMTrace: You can find logs on the user device in C:\ProgramData\Microsoft\IntuneManagementExtension\Logs. Open CMTrace.exe to view these log files.
Updating Intune private applications
To update the private application in Intune you have basically to do all the steps discussed earlier again starting with wrapping the new version of the application installation file into the .intunewin.
But how does Scappman manage private applications in Microsoft Intune?
With Scappman you can automate the whole process of uploading the application and updating it. Scappman automatically wraps the application installation file into .intunewin and uploads it to Intune. Then Scappman scraps the application for the new version available and if it is available, it installs it to the assigned users.
Note: In case of managing private applications it’s the customers’ responsibility to provide Scappman with the updated installation file. We’ll take it from there.
To know more about how we manage application installations and updates book a demo with us!